(4) JavaScript Module - named export, default export
▼ mjs 파일
//calculator.mjs

const PI = 3.14;

function add (a,b) {
  return a + b;
}

function subtract (a,b) {
  return a - b;
}

function multiply (a,b) {
  return a + b;
}

function divide (a,b) {
  return a + b;
}
언제 named export를 사용하고 또 언제 default export를 사용하는지 정리해보자
named export vs default export
사실 꼭 정해진 것은 없지만
보통 파일에서 여러 함수와 변수를 export 하고 싶을 때는 named export,
파일에서 하나의 메인 함수나 변수를 export 하고 싶을 때는 default export 를 쓴다.
calculator 파일에서 PI와 함수들을
하나하나씩 export 하고 싶다면 named export를 사용하여
다른 파일에서는 필요한 것을 import해서 사용할 수 있을 것이다.
//calculator.mjs

export const PI = 3.14;

export function add (a,b) {
  return a + b;
}

export function subtract (a,b) {
  return a - b;
}

export function multiply (a,b) {
  return a + b;
}

export function divide (a,b) {
  return a + b;
}
그런데 이렇게 하나하나씩 export 적용하지 않고 다른 방식으로 export 할 수 있다.
우선 export를 전부 지우고
모든 변수와 함수를 담고있는 calculator 객체를 생성하고
export default를 적용한다.
//calculator.mjs

const PI = 3.14;

function add (a,b) {
  return a + b;
}

function subtract (a,b) {
  return a - b;
}

function multiply (a,b) {
  return a * b;
}

function divide (a,b) {
  return a / b;
}

const calculator = {
  PI,
  add,
  subtract,
  multiply,
  divide,
};

export default calculator;
그러면 다른 파일에서 caclulator를 import하고
다음과 같이 점 표기법으로 필요한 함수나 변수를 사용할 수 있다.
// main.mjs

import calculator from "./calculator.mjs";

console.log(calculator.PI);
console.log(calculator.add(1,2));
console.log(calculator.subtract(1,2));
console.log(calculator.multiply(1,2));
console.log(calculator.divide(1,2));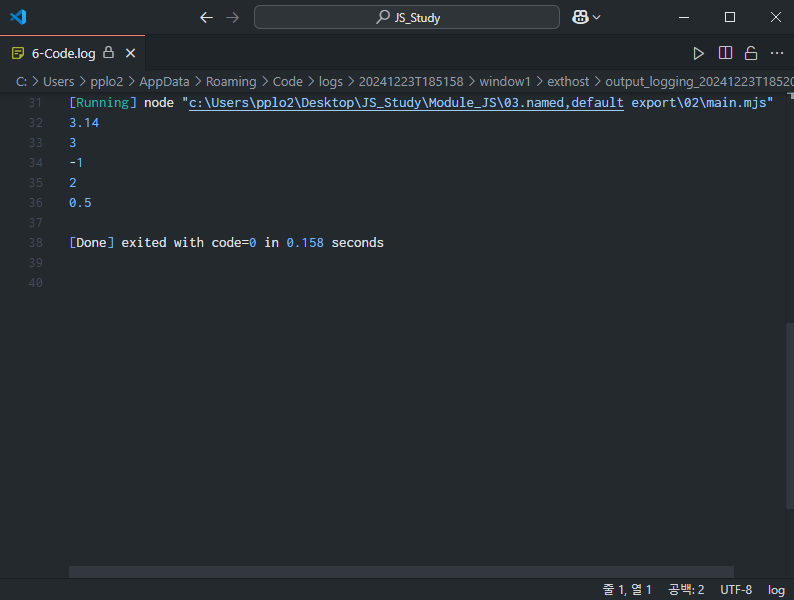
이렇게 객체를 통해 모듈의 기능을 모두 사용할 수 있기 때문에
불러오려는 객체만 default export를 적용해 주면 된다.
하지만 어떤 메인 함수나 변수가 있어도
꼭 그것만 default export 해야하는 것은 아니다.
처음에 했던 것처럼 하나하나씩 named export하여
개별 함수나 변수만 import해서 활용할 수 있고
방금처럼 caculator 객체를 import 해서 모든 기능을 활용할 수도 있다.
이 두 가지 방식은 필요에 따라 사용할 수 있다.
추가적으로 import와 export에 관련된 문법이 몇가지 존재한다.
많이 사용하진 않더라도 종종 쓰이는 문법이다.
추가 문법 - 이름 바꾸기 (as)
as 키워드를 사용하면 name import를 할 때 이름을 바꿀 수 있다.
다음 아래의 코드는 as 키워드를 써서 import 하는 예시이다.
//calculator.mjs

export const PI = 3.14;

export function add (a,b){
  return a+b;
}
// main.mjs
// add 함수 이름을 addNumbers로 이름을 바꿔 import
import { PI, add as addNumbers} from './calculator.mjs'
console.log(addNumbers(1,2));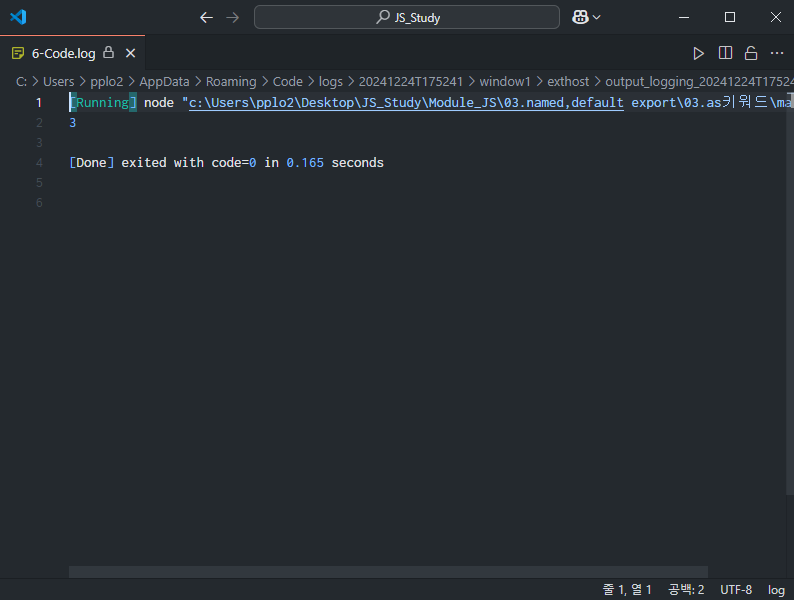
위와 같이 import하는 변수나 함수 이름에 조금 더 구체적인 의미를 부여하고 싶을 때 사용할 수도 있고
이름이 곂치는 경우에도 유용하게 사용할 수 있다.
추가 문법 - 전체 named import 하기 ( * )
에스터리스크 ( * ) 문자를 사용하면 파일에서 named export 되는 모든 것을
한꺼번에 import 할 수 있다.
//calculator.mjs

const PI = 3.14;

function add(a,b) {
  return a + b;
}

function subtract(a,b) {
  return a - b;
}

function multiply(a,b) {
  return a * b;
}

function divide(a,b) {
  return a / b;
}

export { PI, add, subtract, multiply, divide };
// main.mjs
// 에스터리스크 *을 사용하여 파일에서 named export되는 모든 것을 한꺼번에 import
import * as calculator from './calculator.mjs';
console.log(calculator.PI);
console.log(calculator.add(1, 2));
console.log(calculator.subtract(1, 2));
console.log(calculator.multiply(1, 2));
console.log(calculator.divide(1, 2));
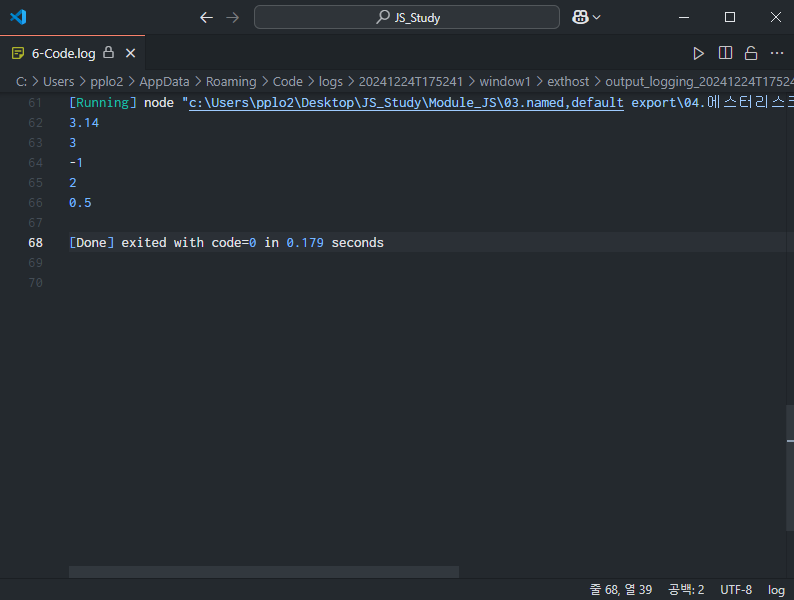
위와 같은 방식의 import를 namespace import(네임스페이스) 라고 부르며
as 키워드를 사용해서 이름을 지정해주고 뒤에 점 표기법을 이용해서 변수나 함수에 접근할 수 있다.
일반적으로는 named imort로 필요한 것만 가져와서 쓰고
꼭 필요한 경우에만 에스터리스크를 사용해서 네임스페이스 임포트를 활용해야한다.